Presets
Presets are reusable photography setups. They let you capture one good setup, save it, and apply it to future single-vehicle or bulk photography runs.

What a preset stores
A preset can store:
| Data | Examples |
|---|---|
| Camera | Angle, pitch, distance, field of view, and camera offsets. |
| Studio setup | Time, weather, screen colour, and whether the vehicle was positioned in the studio or on the map. |
| Vehicle position | Saved map/studio coordinates when available. |
| Vehicle appearance | Mod overrides, colour overrides, and plate overrides. |
| Image settings | Output size, format, quality, background, filters, colour adjustments, padding, positioning, and green screen settings. |
Visual controls that are only part of the current single-vehicle session, such as doors, windows, lights, and indicators, are not saved into presets.
How presets are created
Presets are created from the image editor save flow.
- Take or retake a vehicle photo.
- Position the vehicle and capture it.
- Adjust the image in the editor.
- Click Save.
- When asked Save as Preset?, choose Yes.
- Enter a preset name.
- Click Save Preset & Continue.
The preset name is shown to users. Vehicle Studio also creates an internal preset ID from the name so it can save and load the preset reliably.
How presets are applied
When you start photography, choose Preset in the setup modal and select a saved preset.
If Review setup before photographing is off, Vehicle Studio applies the preset and starts processing immediately. This is the fastest path for bulk photography.
If Review setup before photographing is on, Vehicle Studio opens the positioning screen and then the image editor before processing. Use this when you want to make a one-off adjustment before saving the image.
Presets and bulk photography
Presets are especially useful for bulk photography because every vehicle can be processed with the same:
| Preset part | Why it matters |
|---|---|
| Camera setup | Keeps every vehicle framed consistently. |
| Output size | Makes all images the same dimensions or dynamic sizing behaviour. |
| Background and edits | Keeps dealership/shop images visually consistent. |
| Vehicle modifications | Applies the same stored visual configuration when supported by the vehicle. |
For large batches, create and test the preset on one vehicle first. Then run Bulk Photograph using Only missing for the selected image set.
Where presets are stored
Storage depends on Config.DataStorage.
| Storage mode | Where preset data is stored |
|---|---|
local | local_data/presets/index.json, local_data/presets/<preset-id>.json, and thumbnails in local_data/presets/thumbnails/. |
database | jg_vehiclestudio_presets and related settings in the configured database. |
Do not delete local_data/ unless you want to remove locally stored Vehicle Studio data.
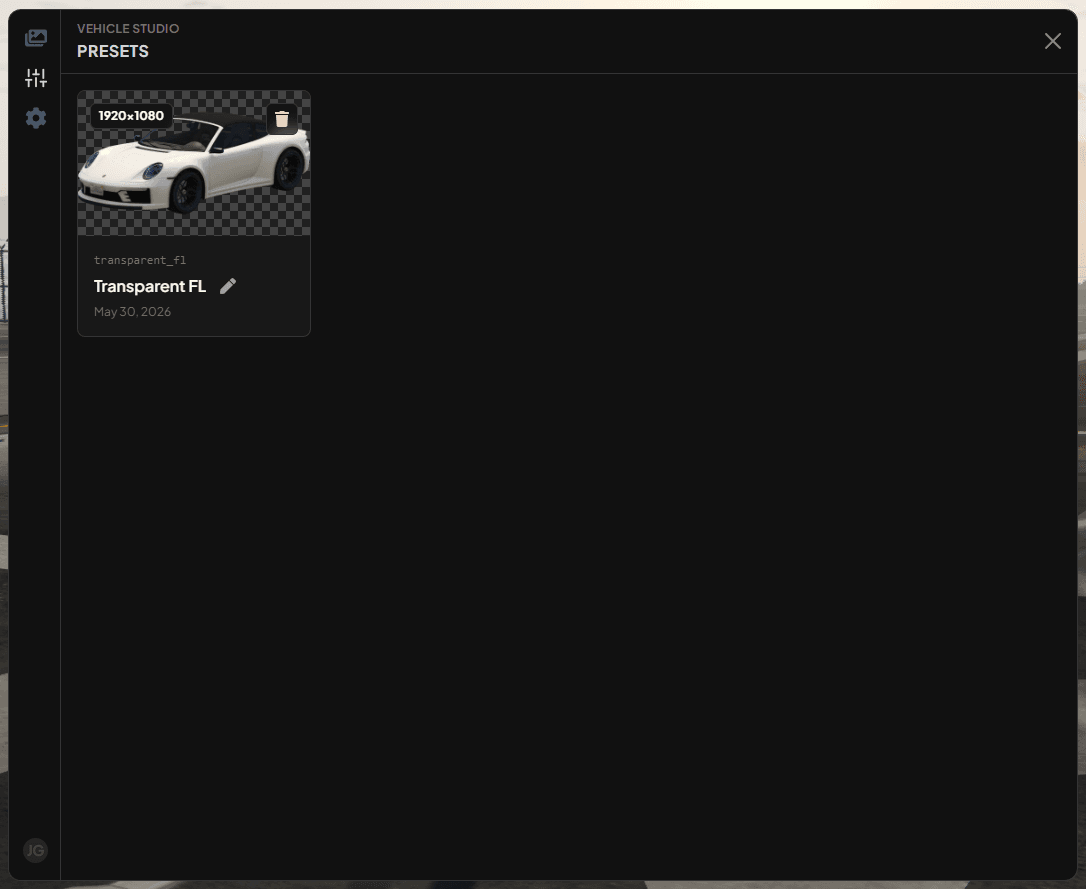
Managing presets
Open the Presets tab to rename or delete presets.
Renaming changes the display name. The internal preset ID stays the same.
Deleting a preset removes the saved preset data and its thumbnail. It does not delete vehicle images that were already created with that preset.
Tips
Use clear preset names such as Dealership Front, Transparent 1200, or Website Banner.
Create separate presets for different output formats or backgrounds. For example, use one preset for transparent website images and another for in-game gallery thumbnails.
When using a preset for bulk work, keep Review setup before photographing off after you have tested the preset.